Patterns are all around us, but we rarely think to photograph them. It’s as if we’re pre-programmed to only photograph obvious subjects – like people, pets, and scenery. If that sounds like you, then you’re missing out. Not only are there countless opportunities to photograph these abstract patterns, but the results can be truly fantastic. In this article, you’ll learn where to look for photogenic patterns, and how to photograph them for maximum visual impact.
1. Find Patterns
Patterns are found wherever strong graphic elements repeat themselves, for example, lines, geometric shapes, forms and colors. The repetition doesn’t have to be absolutely precise or uniform (although that works really well). It can be loose and organic, which works equally well, and can often be more aesthetically pleasing.
Despite being surrounded by patterns, we rarely think of them as photographic subjects, if we notice them at all! So, the first step is to actively look for them.
You can do it right now – wherever you are – in your home, on the train, at work – simply scan your environment for patterns and textures. Repeat this task whenever you have a few spare minutes – in a queue, in a waiting room, on a bus or train – anywhere your brain isn’t required for other, more important things.
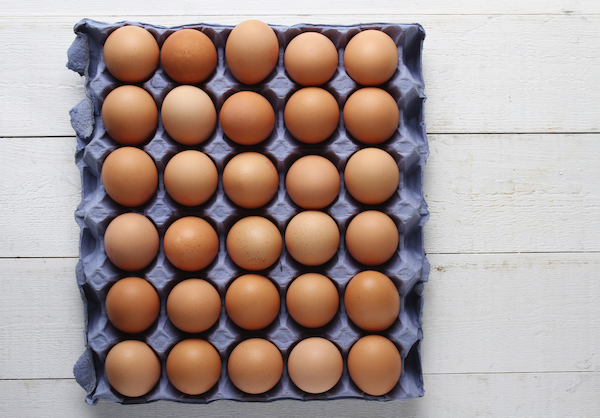
This tray of eggs makes a simple, uniform pattern which is only appreciated from above.
You’ll get better at spotting more amazing patterns more often, and it’ll become automatic. You’ll see things other people don’t see, and they’ll be amazed when you show them your photos.
2. Shoot From Different Perspectives
It’s obvious, but most photos are taken from eye-level. This can result in “obvious”, ordinary photos.
Shooting from a different perspective opens up a wide range of opportunities for all kinds of photography. This includes capturing patterns.
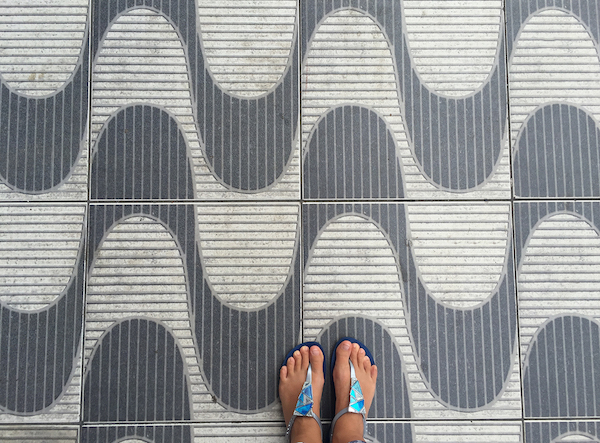
As shown below, shooting straight down reveals the patterns in floor tiles. The inclusion of the girl’s feet gives a sense of context (the pattern is on the floor) and scale (each tile is nearly twice the length of the feet).
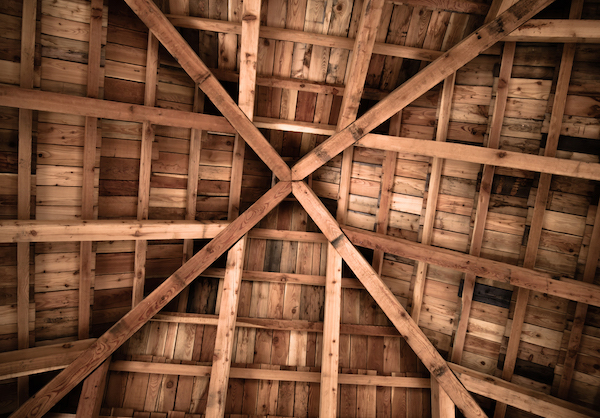
Shooting straight up lets you capture patterns on ceilings – like the attractive repeating pattern created by the underside of these wooden roof tiles, supported by the large wooden beams.
Changing your perspective doesn’t mean simply shooting up or down. A change of perspective can be introduced simply by moving further away from, or closer to, the subject. Shooting this snowy forest from further away has resulted in a much finer pattern.
3. Fill The Frame
To maximise the effect of the pattern you’re photographing, try filling the frame with the subject. You can do this by moving closer to the subject, or by zooming in (avoiding digital zoom and the associated image quality issues).
Filling the frame with your pattern simplifies the scene by removing distracting elements. This has the added benefit of amplifying the impact of your chosen pattern.
It also removes any sense of context or scale from the scene, which gives the viewer more to think about.
Depending upon your choice of focal length, you may get more noticeable lens distortion affecting the image – especially if your pattern includes straight lines. This will be more evident in the corners and nearer the edges of the frame. For perfect results, shoot at a focal length close to 50mm, or fix lens distortion in your favorite photo editing software.
4. Break The Pattern
Following on from filling the frame, it’s perfectly ok to include something in the scene which “breaks” the pattern. That is to say, it disrupts the rhythm or continuity of the pattern in some way. This could be an element which adds context or scale, or which creates a contrast with the pattern’s colors, shape or complexity. It also creates a stronger focal point for the viewer.
In the example below, the diagonal leaf stem “breaks” the pattern in two. The result is much more interesting than if the photo had only included the leaf stripes.
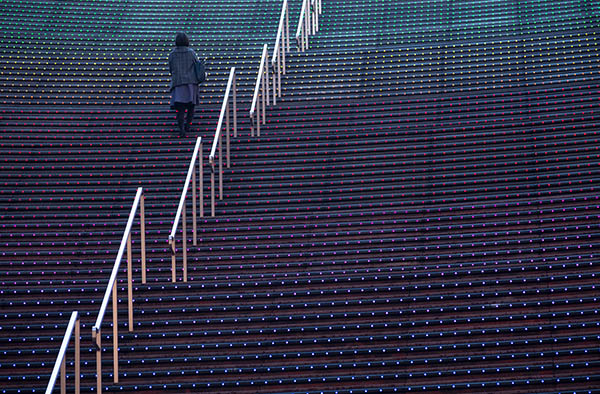
Be careful not to make this new element too large in the frame, so the pattern can have full effect. A white handrail is the element which breaks up the pattern created by the steps below. It’s subtle enough not to take too much away from the pattern, but large enough to create the break we needed.
5. Use Patterns As A Background
Another variation of filling the frame, is to use the pattern as the background for a more substantial subject. Here, the patterned background becomes a secondary subject which supports, complements or contrasts with the primary subject. Again, don’t have your subject too large in the frame, or you’ll risk losing the impact of the pattern.
Always consider whether the patterned background adds or takes away from the foreground subject’s impact.
Remember to use any of the various composition techniques to position your subject for the most pleasing results.
6. Combine Patterns
Combinations of patterns are hard to find, but can work really well, especially if they strongly complement or strongly contrast with each other.
Look for colors that complement each other, or contrasting shapes, linear direction and scale.
7. Create Your Own Patterns
If you’re feeling creative, there’s no need to wait until you find a pattern to photograph. Simply create your own! The only limitation is your imagination. So, raid your sewing box, kitchen cupboards, pantry, toy box or button jar, and arrange identical or similar objects into a pleasing pattern near some nice, diffused window light.
For the price of a few oranges, you have a wonderfully vibrant DIY pattern source.
A few dozen buttons laid flat offers a loose but richly detailed pattern.
These sparsely scattered spinach leaves shot from above create a pleasing pattern.
These different colored beans laid out to make geometric shapes result in a harmonious image with great impact.
Conclusion
As you’ve discovered, patterns come in many forms, and in varying degrees of orderliness. They’re everywhere you look, occurring both in nature and in man-made objects. With some imagination, you can even create your own patterns from items you find laying around the house.
Remember to practice looking for patterns whenever you get the chance, even when you’re not actively taking photos. Shoot from different perspectives to give yourself options, and experiment with filling the frame with your chosen pattern in order to reduce unnecessary distractions.
Where possible, look for ways to break the pattern, by adding an interesting subject in the foreground. Also, capture multiple patterns in the same scene when the opportunity presents itself.
Finally, don’t be afraid to experiment. You’ll learn from your mistakes and quickly become an expert at spotting and capturing patterns in your photography.

