Do your photos sometimes come out too dark or too bright? Getting the perfect exposure is a common problem for even the best photographers, and the best cameras! In this tutorial, you’ll learn how to use the exposure triangle to take control of your camera’s aperture, shutter speed and ISO settings – so that you can shoot perfectly exposed photos every time.
What Is Exposure?
When you take a picture, light from the scene enters the camera and hits the sensor, creating a digital image. Exposure refers to how bright or dark the resulting photo is.
Achieving a good exposure is essential for creating high quality, visually appealing photos. When taking a photo your aim should always be to achieve the best exposure possible, so your photo doesn’t appear too light or too dark.
If a photo is under-exposed (too dark), detail will be lost in the shadows (darker areas of the image). When a photo is over-exposed (too bright), detail will be lost in the highlights (brighter areas of the image).
There are three fundamental elements which control exposure on a digital camera: aperture, shutter speed and ISO.
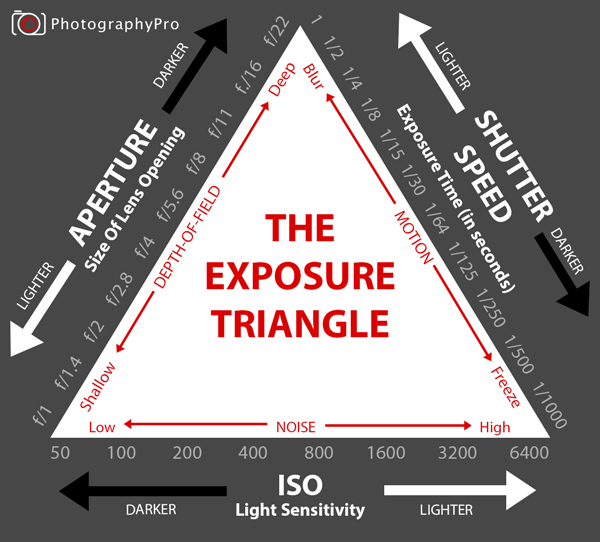
The exposure triangle helps you understand how aperture, shutter speed and ISO work together to determine the exposure.
Before you learn how to use the exposure triangle, let’s look at aperture, shutter speed and ISO.
Aperture
Aperture refers to the size of the opening in your camera’s lens. When you take a photo, light passes through this opening and reaches the camera’s sensor, creating an image.
The aperture of the lens can be adjusted to be smaller or larger. A small aperture lets very little light through. A large aperture lets a lot of light through. Therefore, the size of the aperture affects the exposure of the image, i.e. how light or dark it is.
Aperture is measured in f-stops, often referred to as f/number, e.g. f/2, f/8, f/22, etc. One thing that people often find confusing is that the larger the f/number the smaller the aperture. At f/2 the aperture is very large and lets lots of light in, whereas at f/22 the aperture is very small and lets much less light in.
In addition to contributing to the exposure, aperture controls depth of field. This refers to the amount of the image that is in focus.
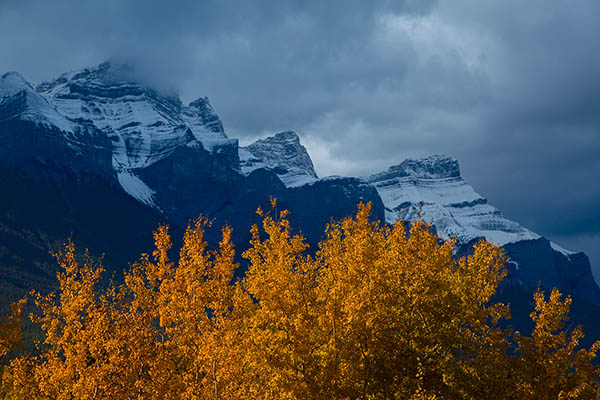
A large depth of field means that all or most of the image will be in focus whether objects are near or far away. This is perfect for landscape photography.
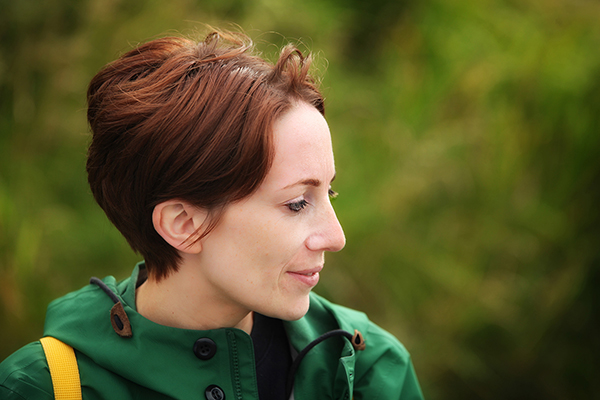
A shallow depth of field means that only part of the image will be in focus and the rest will be blurred. This is perfect for portrait photography.
Shutter Speed
Shutter speed refers to how long the camera’s sensor is exposed to light when you take a photo.
The shutter speed can be adjusted to be faster or slower. A fast shutter speed exposes the sensor to very little light. A slow shutter speed exposes the sensor to a lot of light. Therefore the shutter speed affects the exposure of the image.
Shutter speed is measured in seconds or fractions of a second. e.g. 4 seconds, 1 second, 1/60th second, 1/250th second, etc.
A 4 second shutter speed is much slower than a 1/250th shutter speed, and lets more light reach the camera’s sensor, resulting in a brighter image.
In addition to contributing to the exposure, shutter speed controls how motion is captured in your photos.
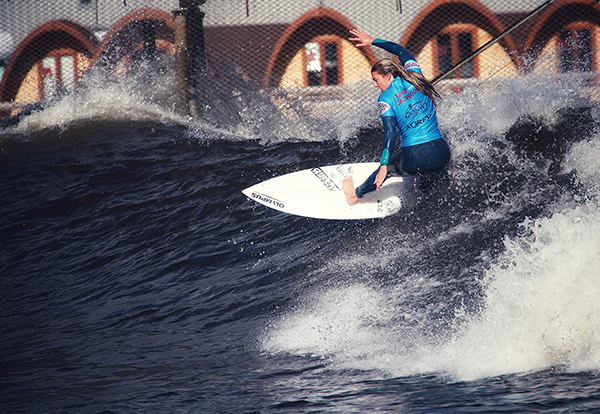
A fast shutter speed will freeze any movement in the scene. This is perfect for sports and action photography. If you’re hand-holding your camera, rather than using a tripod, a fast shutter speed is desirable in order to avoid blurring from camera shake.
A slow shutter speed will capture any movement as motion blur. This is used in long exposure photography, for example, to capture a veiling effect on water, light trails at night, or a sense of movement in your image.
ISO
ISO refers to how sensitive your camera’s sensor is to light. Therefore ISO affects the exposure of the image.
ISO can be adjusted to make the sensor more or less sensitive to light.
A low ISO value (e.g. 100 or 200) means low sensitivity to light – which is exactly what’s needed in bright conditions in order to avoid overly-exposed photos.
A high ISO value (e.g. 800, 1600 or higher) means a high sensitivity to light. This can help in low-light situations where you need the camera to capture more light for a better-exposed image.
Be aware that ISO affects image quality. Shooting at high ISO values can cause your photos to appear grainy. In digital photography we refer to this grain as “noise.” Noise appears in images as random colored pixels, especially in darker areas of an image such as night skies.
The Exposure Triangle Explained
The key to creating perfectly exposed images is to balance the aperture, shutter speed and ISO values to ensure the image doesn’t appear too dark or too bright.
The exposure triangle diagram below illustrates the relationship between these three elements. It helps you understand why your camera automatically chooses certain exposure values and what you can do to take control of exposure when you need to.
When you increase the exposure for one element (a white arrow), one or both of the other elements (the black arrows) needs to be decreased in order to maintain the same exposure.
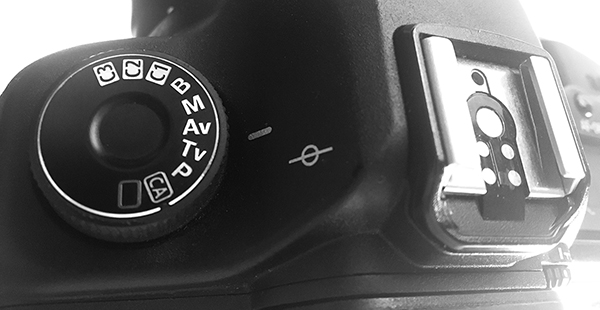
Depending on which shooting mode you’re using, either the camera will do this automatically, or you’ll need to dial in the values yourself. Below you’ll discover how to control exposure using Program, Aperture Priority, Shutter Priority and Manual shooting modes.
Program (P) Mode
In Program mode, the camera will automatically set the shutter speed and aperture in order to achieve a good exposure. However, turning the dial/thumbwheel does allow you to adjust both shutter speed and aperture values at the same time, keeping the same exposure (image brightness).
If you change the ISO value, Program mode will automatically adjust the shutter speed and/or aperture values to keep the same exposure.
Aperture Priority (AV or A) Mode
In Aperture Priority mode, you set the aperture value to determine the depth of field you require. The camera then automatically sets the shutter speed to ensure a good exposure.
For example, if you reduce the f/number to use a larger aperture, letting more light in, the camera will automatically adjust the shutter speed to be faster, which lets less light in – keeping the exposure balanced.
If the shutter speed is too slow, resulting in unwanted motion blur, increasing the ISO value will give you a faster shutter speed while keeping the same exposure.
If the shutter speed is faster than you require, then you can reduce the ISO value, for less grainy/noisy images.
Shutter Priority (TV or S) Mode
In Shutter Priority mode, you set the shutter speed to determine how any motion is captured in your photo, e.g. to either freeze or blur motion. The camera then automatically sets the aperture to ensure a good exposure.
For example, if you choose a faster shutter speed, letting less light in, the camera will automatically adjust the aperture to be larger, which lets more light in – keeping the exposure balanced.
If the aperture is too large, resulting in a depth of field which is too shallow, increasing the ISO value will give you a smaller aperture while keeping the same exposure.
If the aperture is too small, resulting in a depth of field which is too deep, decreasing the ISO value will give you a larger aperture while keeping the same exposure.
Manual (M) Mode
In Manual mode, you’re completely responsible for achieving a good exposure. You have to manually dial in the aperture, shutter speed and ISO values you require. The camera doesn’t automatically set any of these values (unless you have Auto ISO enabled).
When using Manual mode, the exposure triangle will help you decide what changes you need to make to keep aperture, shutter speed and ISO balanced for a good exposure.
Fine Tune With Exposure Compensation
Some scenes can fool your camera into under-exposing or over-exposing. In situations like this, use the exposure compensation control on your camera to fine tune the exposure. This setting simply allows you to tell the camera to make the image brighter or darker. It does this by tweaking the aperture and/or shutter speed values.
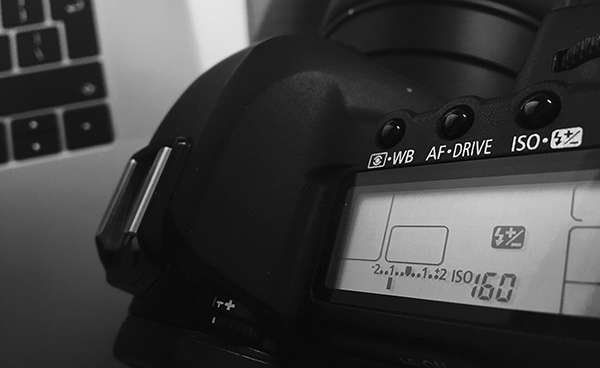
Exposure compensation is usually shown as a scale, e.g. from -2 to +2 as shown below. On most cameras there’s a +/- button which gives you access to the exposure compensation controls.
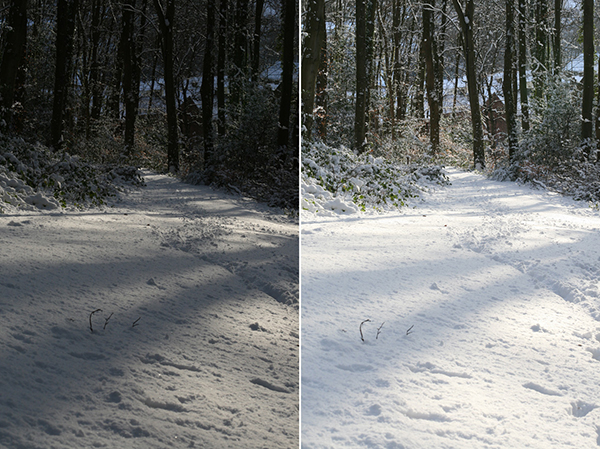
A classic example is a snowy scene – where your camera will under-expose as it tries to reach what it thinks is the correct exposure. Unfortunately, this results in white regions of the photo being rendered gray.
The two photos side-by-side below illustrate the problem. The bright white snow tricked the camera into under-exposing. Increasing the exposure compensation brightened the image so the snow appeared as it did in real life.
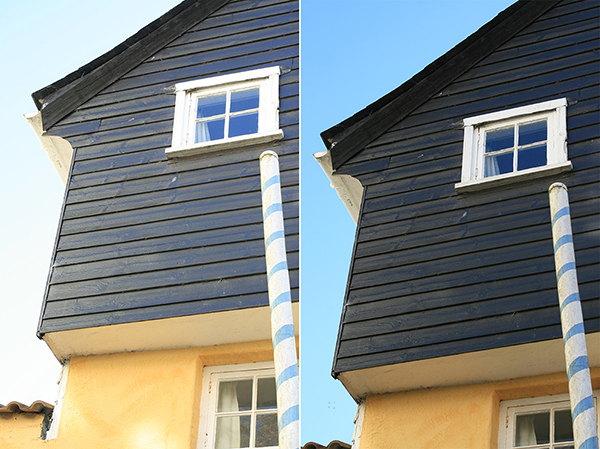
Another example is when photographing something where the majority of the scene is dark. The camera over-exposes to achieve a correct exposure and the dark colors look pale and washed out.
In the example below the dark wooden building tricked the camera into over-exposing, making the image look a little burnt-out (too bright). Decreasing exposure compensation darkened the image resulting in a more realistic representation of the scene.
Exposure Triangle: Conclusion
To recap, the combination of aperture, shutter speed, and ISO result in an exposure. In all camera modes (apart from Manual) your camera will automatically compensate for any changes you make. To do this the camera automatically adjusts one of the other exposure triangle variables.
Hopefully, this article has helped you understand the three important factors that contribute to a good exposure and how they relate to each other so that you can take better-exposed photographs.

