DSLR and mirrorless cameras are getting smart. Leaving your cameras in full auto mode can give you decent results. However, it barely scrapes the surface of what your camera is capable of. Your camera controls are there to help you sculpt an image the way you see it in your mind. Stepping away from the safety of full auto allows you to learn more about your camera controls helps you develop as a photographer. In this article, you’ll discover how to use the basic camera controls that every DSLR and mirrorless camera has to create really great images.
1. Choose The Right File Format For Your Images
One of the first camera controls you should get to grips with is the setting for image quality. Even cheap point-and-shoot cameras have the option to choose the size or quality of captured JPEGs.
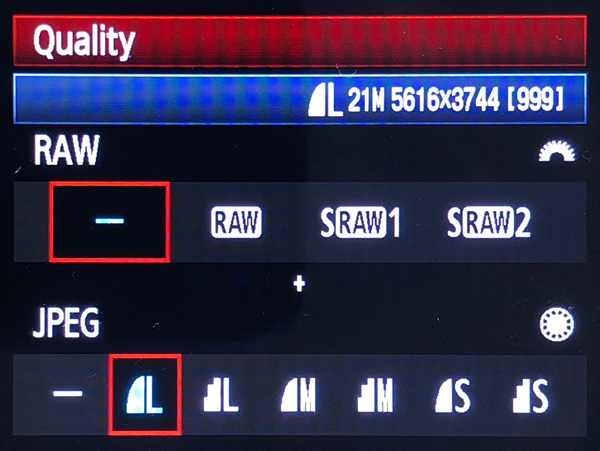
The example below shows the Quality settings on my Canon 5D mk ii. The blue bar shows a smooth, curved segment, representing fine quality, the number of pixels (21 million), the image resolution (5616 pixels wide by 3744 pixels high). Lastly, it shows that 999 photos of this size and quality can be stored on the memory card.
It also shows that no RAW images will be captured, but large, fine quality JPEG images will be captured.
Sizes are usually in the range small, medium and large. Quality can be basic, normal or fine (represented by smooth or stepped segments in the photo above).
Always select the highest quality you can. Memory cards are relatively cheap, and choosing a low file size or image quality will reduce your options for using the images at a later date, e.g. for printing, or cropping.
The very best image format to choose is your camera’s RAW format. RAW is an umbrella term for unprocessed images.
RAW images store a much larger range of data, making them quite large files, often ten times larger than the equivalent JPEG. However, additional data gives you much more scope when it comes to editing the photos.
You can usually choose to shoot RAW only, or RAW & JPEG.
Because larger files take longer for the camera to store, shooting RAW can reduce how quickly your camera can capture successive shots in continuous shooting mode.
2. Select The Most Suitable Drive Mode For Your Subject
There are three basic drive modes available for any DSLR or mirrorless camera. As camera controls go, this one is important – and understanding each of the three drive mode options should be a priority for you.
2.1 Single Shot Mode
Single Shot takes one picture when the shutter button is fully pressed. Use this mode for static subjects.
Single Shot is less suitable for fast-moving subjects, or when you’re moving, as there’s a risk this one shot will be slightly too early or too late for a perfectly timed shot.
2.2 Continuous Mode
Continuous mode takes shots from the moment the shutter is fully pressed until it’s released or the buffer is full. It’s a great mode for fast moving subjects, or for special events where you could easily miss the moment.
However, this mode is very memory-hungry, needing plenty of capacity on your memory-card, and will require a lot of time spent culling the resulting images.
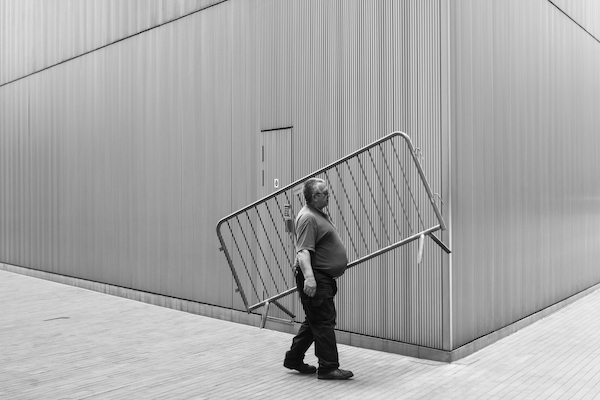
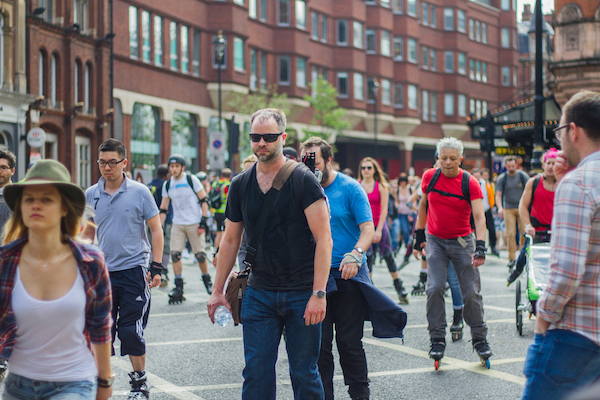
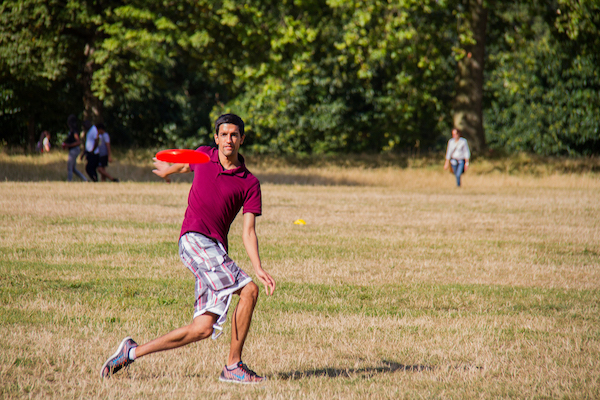
Using continuous shooting mode, the photographer of the photo above was able to shoot several photos in quick succession and use the one perfectly timed shot.
2.3 Timer Mode
Timer mode doesn’t take the photo as soon as you press the shutter button. Instead, it waits for a specified amount of time you’ve chosen from your camera’s available settings. It’s usually from two or three seconds up to ten seconds.
This is a great drive mode for photographs taken using a tripod as it eliminates any camera shake introduced by the photographer’s hand.
It’s also essential when the photographer needs to be in the photo. The downside is that it’s difficult to be sure the shutter will fire at the optimal moment.
Understanding these drive modes and how you can use them will help you get greater control and sharper shots.
3. Select The Best Camera Mode
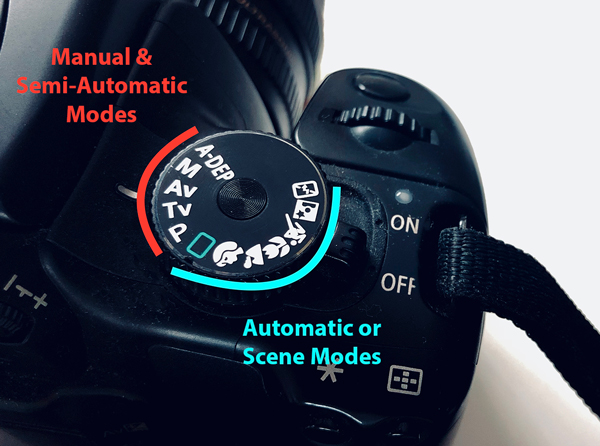
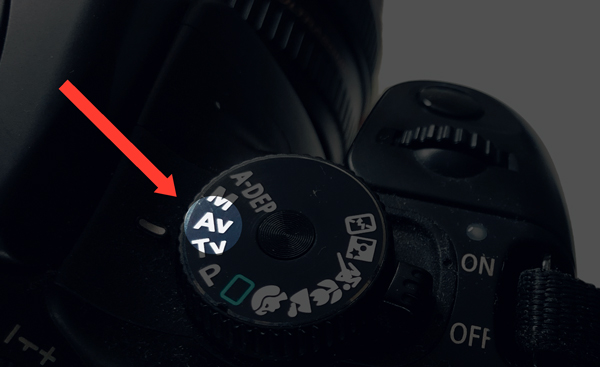
All digital cameras have several shooting modes which range from fully automatic to fully manual, with semi-automatic modes giving you control over some settings while allowing the camera to determine the other camera settings.
Fully automatic modes include full auto, where the camera chooses all the important camera settings, and scene modes.
Scenes are preset automatic modes which tell your camera what type of image you’re shooting. The camera will use that information to set the correct exposure and focus. An example of this is “Night scene” which will prioritize a faster shutter speed.
There are three common semi-automatic modes; Program (or Program Auto), Aperture Priority and Shutter Priority.
Program (or Program Auto) will set both shutter and aperture for you, but it will allow you to change the balance between the shutter speed and aperture, increasing one while decreasing the other, keeping the exposure constant all the time. This is often the first step that new photographers take away from full auto.
Aperture priority mode allows you to set the aperture you want while letting the camera choose a suitable shutter speed. This mode allows you more creative control over the image, and, in particular, the depth of field.
Shutter priority works the opposite way; you set the shutter speed and the camera sets the aperture automatically. This can be a way of making sure that you get a sharp image in lower light, or freezing fast-moving subjects.
4. Use Auto-Focus To Get Clearer, Sharper Images
Perhaps the most important camera controls to understand are the various focusing modes. They fall into two groups – manual and auto – and both have their uses. Understanding these modes will help you take clearer, sharper images.
Most cameras are set to use an autofocus mode straight out of the box. This means that when you point your camera at a subject it will automatically determine what to focus on.
Autofocus works by finding contrast. If you point your camera at a plain, featureless wall, it will struggle to lock on to something which it can use to give it a clear focus.
Always aim the focus at a point of contrast to reduce your chances of experiencing focus hunting, where the camera lens moves back and forth trying to find the right setting.
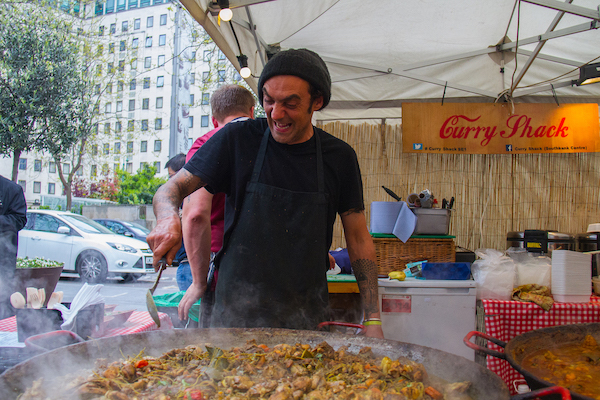
The street vendor shown below is surrounded by lots of detail, both in the foreground and the background. This is a scene that could easily trick your camera into focusing on the wrong subject.
Most cameras have multiple focus points. The next few sections will look at how you can use some of these.
5. Use Single Spot Focus For Static Subjects
The most commonly used autofocus mode is single spot focus. This is most suitable for static subjects or scenes such as landscapes, portraits, and still life. This setting is displayed as a single dot inside a square or square brackets
Most cameras will allow you to choose a focus point. Some will allow you to grow or shrink the area of focus around a central point. These settings are usually top-level settings – meaning you should be able to access these without diving too deep into your camera’s menus.
Most of the time it makes sense to choose the central focus point. However, this doesn’t mean that your subject has to remain in the center of the frame.
Point your camera so that the central focus point is on an area of the scene you want in sharp focus. Then, half-press the shutter button. The camera will attempt to focus on your chosen focal point.
Then, without releasing the half-pressed shutter, recompose the scene. Perhaps you’ll want your subject to be slightly off-center.
Once you have recomposed, fully press the shutter button.
6. Use Continuous Focus To Track Moving Subjects
Most DSLR or mirrorless cameras allow you to choose a continuous focusing mode.
This mode uses most or all of your focus points to track your subject. Once you start to press the shutter button the camera will follow the subject, keeping them in focus, as they move through the shot.
On Canon cameras, this mode is referred to as AI Servo AF and on Nikon it’s AF-C.
This mode isn’t quite as accurate as single spot and you may still get some blurry shots. Also, as your camera’s working extra hard, the battery will run out of charge more quickly than the simpler autofocus modes.
7. Use Manual Focus To Get More Control
Many great photographers shoot in manual mode all the time. It’s the best way to have complete control over the image you produce. But many others prefer to shoot in auto and only use manual for tricky shooting situations.
If you are shooting through glass, at a zoo or aquarium, for example, you can prevent your lens from focussing on the glass itself and ensure that your subject is what’s in focus. It’s also a great tool for landscapes in low light.
Auto-focusing can have trouble in low light so setting the manual focus to infinity can save you time and get great results.
8. Use Exposure Compensation To Take Control Of Your Exposure
Most, if not all, DSLR and mirrorless cameras offer a way to apply some exposure compensation. This is a manual adjustment to tweak the brightness of the final image before capture. This setting can be adjusted through the settings menus or via a dedicated dial or a multi-purpose dial.
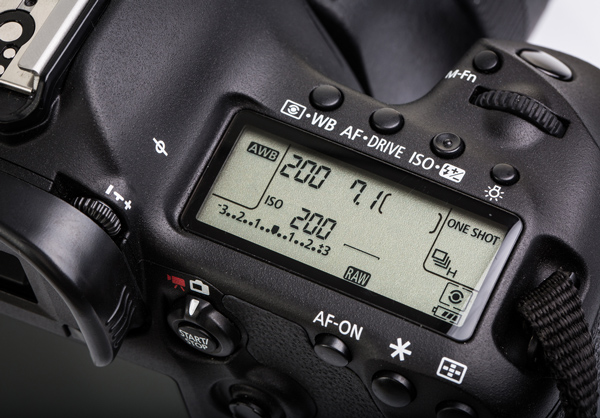
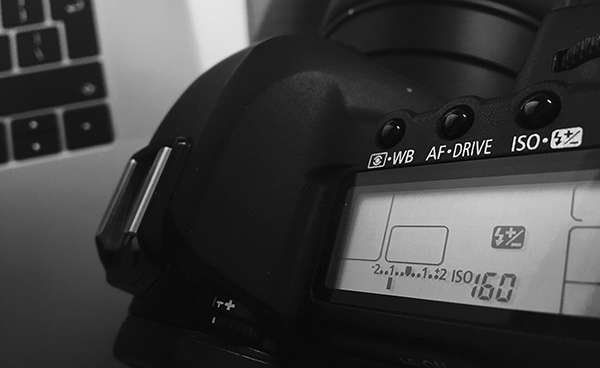
In the photo below, you can see from the dotted, numbered, bar on the camera’s LCD screen, that an exposure compensation of -1 has been selected. This halves the amount of light that will reach the camera’s sensor.
Exposure compensation is great for correcting extreme lighting. When the camera meters (checks how much light is available), it takes an average and uses that to set the right exposure.
But sometimes the average exposure doesn’t make for a great shot:
- A dark scene (e.g. a portrait subject wearing dark clothes, photographed against a dark background) will be overexposed, making the dark clothes too light, and any bright regions of the scene may be burnt out.
- A bright scene (e.g. lots of white snow) will be underexposed, making the snow a dull gray color, and the detail in any very dark areas completely lost.
As camera controls go, exposure compensation is one of the most useful, as it lets you quickly compensate for problems with exposure, without having to change shooting mode, or any other settings.
9. Understand The Exposure Triangle To Create Balanced Images
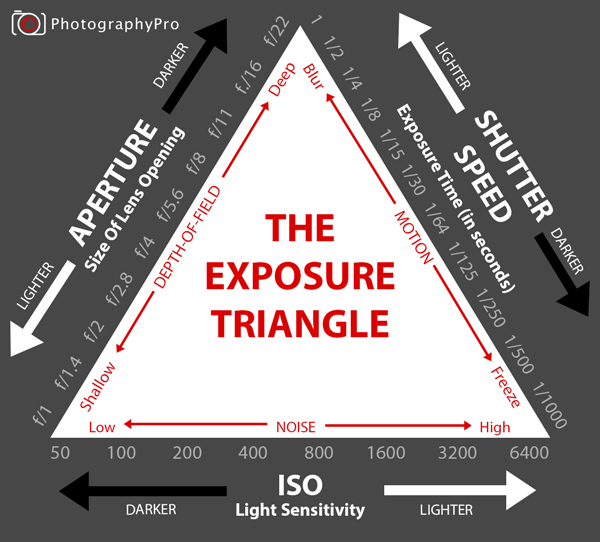
Exposure triangle describes the relationship between the three primary exposure settings. It determines how bright or dark your photo is and what settings to use to get a good exposure. The available settings are aperture size, shutter speed, and ISO.
In short, slow shutter speeds, wider apertures, and high ISO values contribute to making an image brighter. Fast shutter speeds, small apertures, and low ISO values contribute to making a darker image. A good exposure is the result of getting the balance right between each of these three settings.
In automatic or semi-automatic modes, your camera will automatically adjust some or all of these three settings to give a good exposure.
However, in manual mode, you have to take control over what value each of the three settings has.
Understanding how each of these camera controls works individually and in conjunction with one another will help you to take well-exposed images every time.
10. Change Your Aperture Settings To Vary The Depth Of Field
Your camera lens has an adjustable aperture. It’s the hole which allows the light to pass through the lens. Aperture size is measured in f-stops.
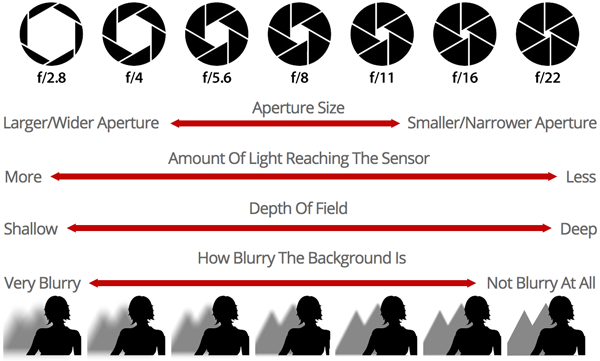
The science and math behind this isn’t relevant here, but you do need to know that your lens’ lowest f-stop number (e.g. f/2.8) has the widest aperture, and the largest f-stop number has the smallest aperture (e.g. f/22).
Aperture size is the main factor in determining how much of your subject or scene, from front to back, is in acceptably sharp focus. This is known as depth-of-field.
A large aperture (remember, small f-stop number, e.g. f/2.8) will give a shallow depth of field, with little of the scene in front of, or behind, the subject being in focus. This is ideal for subject isolation – where you want the subject to stand out clearly from its surroundings.
A small aperture (large f-stop number, e.g. f/22) will give a large depth of field, with more of your scene in focus. This is perfect for situations where you want maximum detail, not just in the subject, but also in the foreground and background. Landscape, architectural and street photography benefit greatly from a small aperture.
11. Choose The Best Shutter Speed For Your Lighting Conditions
Shutter speed is expressed as a fraction of a second, or in whole seconds. It determines how long the camera’s shutter remains open, and, therefore, how long the camera’s sensor is exposed to light.
Longer shutter speeds are often required in low-light which leads to problems when hand-holding your camera.
As a rule of thumb, when hand-holding your camera, never use a shutter speed value (ignoring the fact it’s actually a fraction) which is longer/slower than your lens’s chosen focal length.
e.g. A shutter speed of 1/60 seconds is too slow for a focal length of 200mm.
For a 200mm focal length, you should use a shutter speed which is faster than 1/200 seconds.
Fast shutter speeds freeze the subject in sports or action photography. You’ll need good lighting in order to capture enough light for a good exposure. Shutter speeds as fast as 1/4000 seconds are common on most cameras, but cameras with far higher shutter speeds are available too.
12. Use The ISO Settings To Create Sharper Images In Low Light
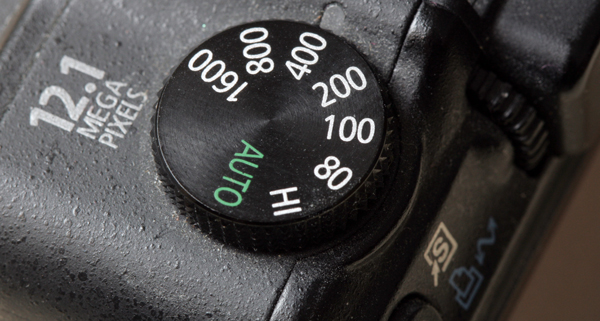
In digital photography, ISO is the sensitivity setting of the sensor. The more sensitive the sensor (higher ISO value) the more light it will capture even in low-light conditions. The lower the sensitivity, the less light it will detect.
This sounds like you’d always want a high ISO but the tradeoff is that higher sensitivity settings will create more grain in your images. Therefore, you should always use the lowest ISO value you can get away with, since this will minimize grain.
In bright conditions, a low ISO value is ideal – e.g. ISO 100 or ISO 200.
In darker conditions, or where you want to use a faster shutter speed or a smaller aperture, use a higher ISO value – e.g. ISO 800 or ISO 1600.
13. Use Depth-Of-Field Preview To Check Focus
When you look through the viewfinder of your DSLR you see the scene through a wide open aperture.
Using your camera’s depth-of-field (DOF) preview button shows you what the scene would look like through the aperture you’ve selected. This can help you to identify what’s in focus and what’s not in focus. Then you can make any adjustments you’d like to make.
One reason many people shy away from this control is that the image can appear darker in the preview. This is because a smaller aperture lets in less light. Rest assured, this doesn’t mean the resulting photo will be too dark.
Camera Controls: Conclusion
These are only some of the camera controls available on your digital camera. But they represent the most useful camera controls you can reasonably expect to find on nearly all cameras.
You now have a broad understanding of the different camera controls mentioned. This should act as a great starting point for some experimentation with the more advanced features your camera has to offer. Happy shooting!

